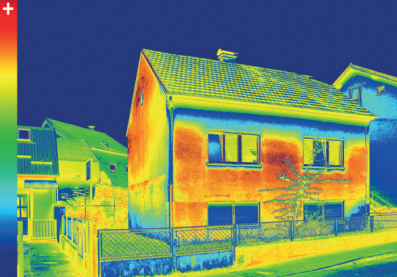
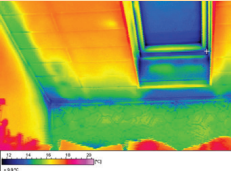
You don’t need to break the bank to make your home airtight. Here, we explore airtightness installation tips and highlight common mistakes to avoid.
In this article we cover:
- Common reasons for failing the airtightness test
- The most cost effective ways to make your home airtight
- How to make blockwork walls airtight
- How to make wall to floor junctions airtight
- How to make windows and doors airtight
- Pros and cons of using plaster
- Experience using airtightness paints
- What is thermal imaging and why use it
Sealing your house to make it airtight and prevent air leakages is crucial for building a home that retains heat in winter. Here’s what self-builders need to know about getting airtightness right on site.
What is the most common reason for poor airtightness test results?
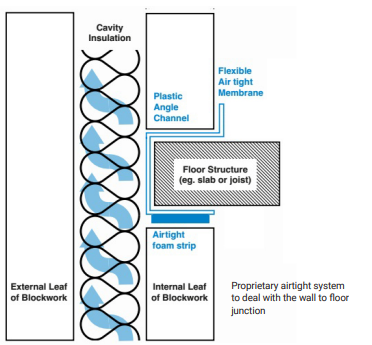
One of the most common leakage points is where the upper floor penetrates the cavity wall, sitting on the internal skin of the cavity wall. It’s a tricky area often overlooked by self-builders and contractors.
While some use an airtight membrane around the concrete slab, it often gets damaged during construction.
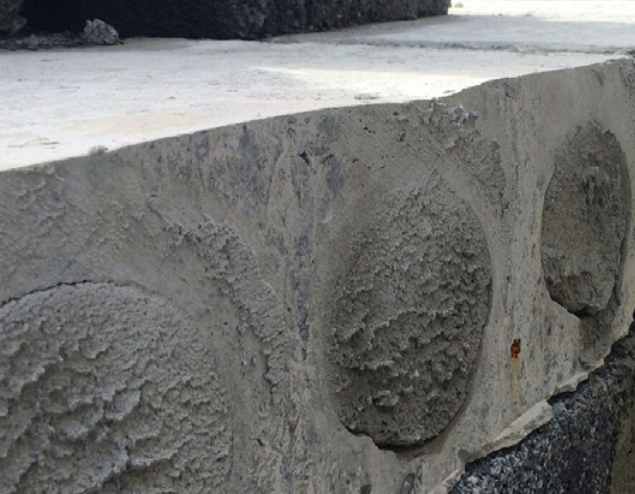
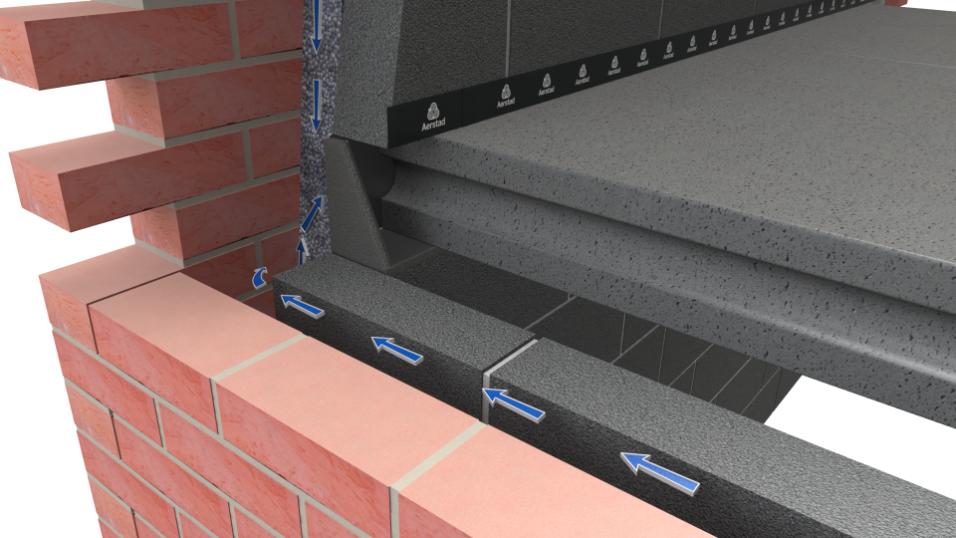
[adrotate banner="58"]You could try sealing concrete slab holes with mortar or expanding foam, and joints between slabs with flexible mortar or foam. However, this isn’t foolproof, which is why we developed a proprietary system to handle this junction.
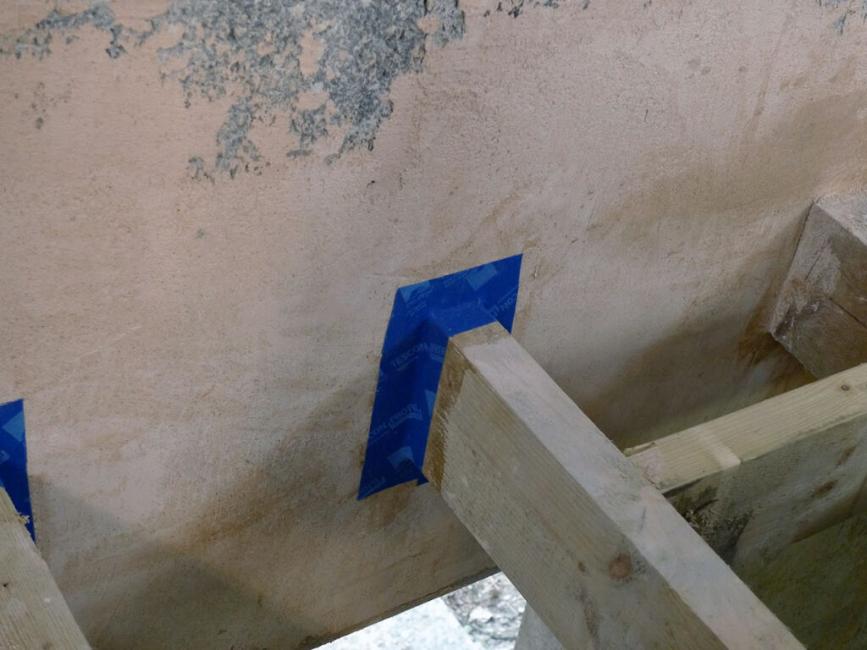
For timber joists, sealing can be easier by taping around each one and applying a scratch coat between them. However, this is time-consuming and prone to human error.
What’s the most cost effective way to make my home airtight?
On a block build, it’s unnecessary to install costly airtight membranes. By using gypsum plaster and standard sand/cement mortar you can achieve excellent airtightness test results, even below 1 m3/hr/sqm, far better than the energy efficiency threshold of 3 m3/hr/sqm. I’ve seen homes sealed this way and achieving airtightness results of lower than 1 m3/hr/sqm.
However, airtight membranes and tapes alone don’t guarantee success and architectural designers don’t necessarily provide details of how to install them.
For membranes to work, they must be continuous, as any penetration renders them ineffective. To avoid issues:
- Keep building services within the airtight envelope, such as a service void between the plasterboard ceiling and the underside of the airtight membrane.
- In timber frame homes, a service batten simplifies achieving airtightness.
We test a lot of near zero energy buildings (NZEB) and passive houses, and most builders go for timber frame because it’s easier to get them airtight prior to plasterboard and plaster
For ICF homes, airtightness is inherent, with extra care needed only around openings like windows or vents.
How can I make blockwork walls airtight?
Best practice is to apply a scratch coat to the internal leaf of the blockwork before skimming or drylining. Then make sure all sockets, and anything else that’s chased into the wall, are bedded in mortar.
The scratch coat seals the blockwork pores, preventing air from passing through the cavity during a blower door test and escaping at skirting board level or through switches.
Bedding conduits in mortar where they enter the attic is good practice and prevents air from the cold roof space travelling down the track in the blockwork and entering the building via electric sockets. Plastic faceplates won’t block this airflow. Bedding the socket box in mortar also reduces fine air leakage from behind the blockwork.
If you’re installing plasterboard (insulated or not) on the internal leaf of your external cavity wall, always fit the plasterboard for the ceiling first. It’s usually done the other way around. If you put plasterboard on the wall first, air from the cold roof space will come down behind it and during the test you’ll feel it coming into the room via gaps around the skirting board or sockets/ switches.

What’s the best way to seal the upper floor junction with the cavity wall?
Poor test results often stem from this tricky junction. Consider these solutions:
How can I make windows and doors airtight?
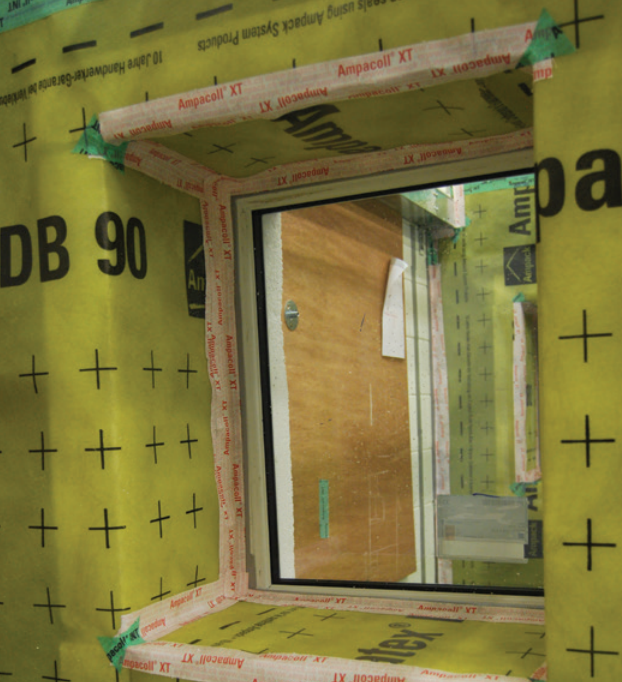
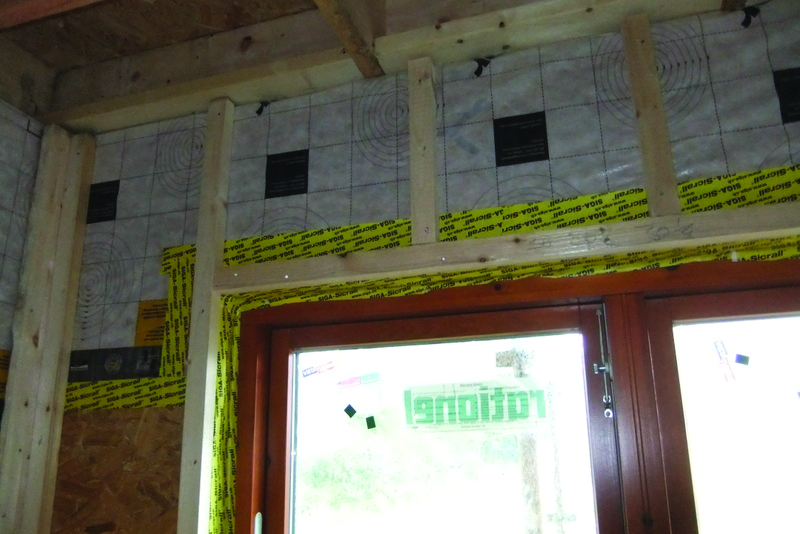
For a passive house standard result, I’d advise taping around all four reveals of the windows, making sure your plaster is coming in tight to the tape so you seal that joint completely. If you’re looking to hit an airtightness of 3 m3/hr/ sqm, using the tape around the windows isn’t really necessary. Just seal all four reveals with plaster/ skim.
What about airtightness at attic ceiling level?
The same principles apply: you can either use the airtight membrane approach or rely on a plaster/skim finish. A properly drylined or skimmed plasterboard ceiling will be airtight. Any penetrations in the plasterboard, such as for spotlights, can be sealed from above. For example, it’s good practice to fit proprietary airtight hoods over the lights in the attic. When properly sealed plasterboard is installed, there’s no need for airtight membranes.
Many builders and self-builders install an airtight membrane on the underside of their ceiling joists, followed by a board directly on top of the membrane. Then they’ll cut out holes for spotlights or cables and destroy the integrity of the membrane. If that’s the way they’re going to do it, they’re better off not putting it in.
If you plan to use an airtight membrane, you must incorporate a service void beneath the ceiling / within the walls, so you’re not penetrating the membrane. If you go with a membrane you don’t need to make the plasterboard airtight, i.e. no need to install hoods.
Won’t plaster-based airtightness eventually crack?
Yes, but if you let the house dry out gradually, any cracking should be minor and easy to fix — unless there’s an underlying problem like subsidence.
So yes, airtight tape is the best solution for testing and proven durability. However, in most cases, plaster around windows won’t crack more than a millimetre, which is negligible. For that reason, I don’t think the cost of the membrane and the time spent installing it will ever truly pay off.
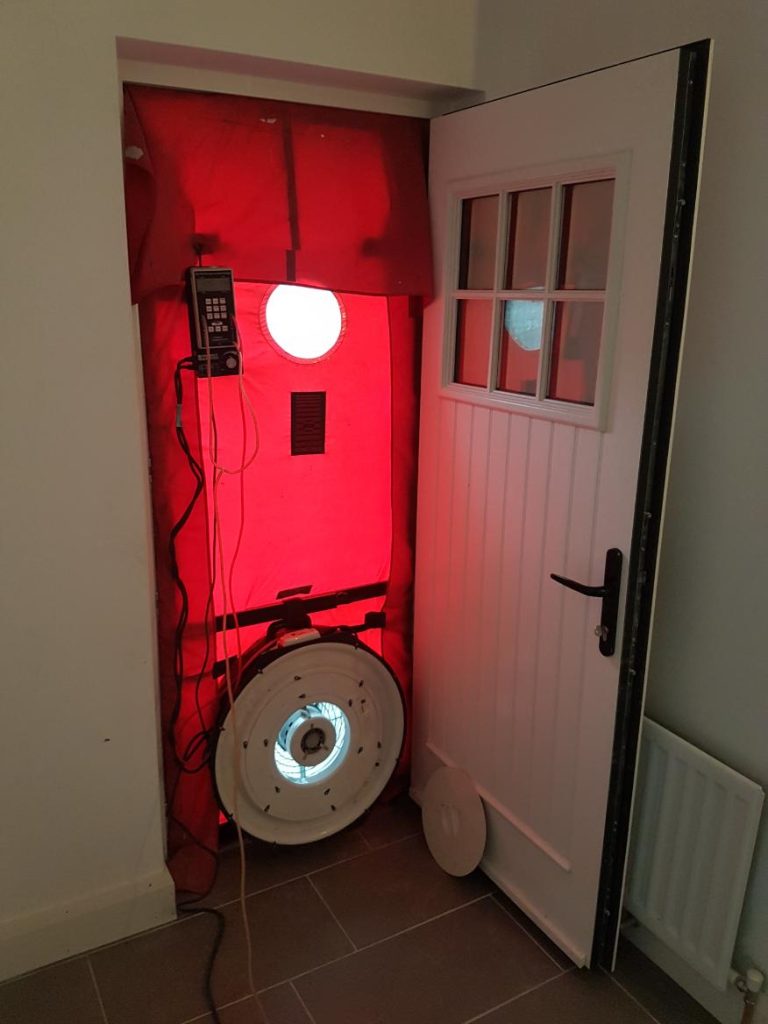
How have airtightness paints performed in your airtightness tests?
Airtightness paints are certified to work, but proper application is crucial. In my experience, just brushing the paint onto a wall doesn’t do the job. Spraying the paint and applying the correct amount is more effective. To make sure it will work, I’d advise using a contractor who’s qualified to apply the product.
Additional information: Aerstad, aerstad.com for the junction between floor and wall; Thermahood, thermahood.com for downlight covers.
What is thermal imaging and why use it?
Thermal imaging captures a heat map of your home to identify air leaks and weak insulation points. It’s particularly useful for verifying proper insulation installation, such as EPS beads in cavity walls.
Building control and assigned certifiers don’t require a thermal image, so most people skip the cost of getting one. As a result, fewer companies now offer the service. The test does need to be done in winter to achieve the 10°C temperature difference between inside and outside. This could be why it’s not mandatory — certain times of the year wouldn’t allow for it, delaying the sign-off process.

