Pay attention to sills and reveals when building with Insulating Concrete Formwork (ICF).
In this article we cover:
- How to install window heads, sills and reveals in an ICF build
- What cavity closers are and how they work with ICF
- Best practices for sealing around chimneys
- Using ICF for internal walls
- Key watchpoints at this stage, with visual examples
In ICF construction there is no need for traditional horizontal and vertical damp proof courses (DPC) at window and door openings. Because the structure is a reinforced concrete build, there is also no need for precast or steel lintels — regardless of the size of the openings.
Instead, structural engineers can specify additional rebar over window and door heads that will allow the concrete core to carry the window and door openings. For wider spans it can also eliminate the need for intermediate supports such as steel/concrete columns.
If you need a reinforced column, to provide additional support, you can have it placed vertically and incorporated into the core of the ICF walls.
[adrotate banner="58"]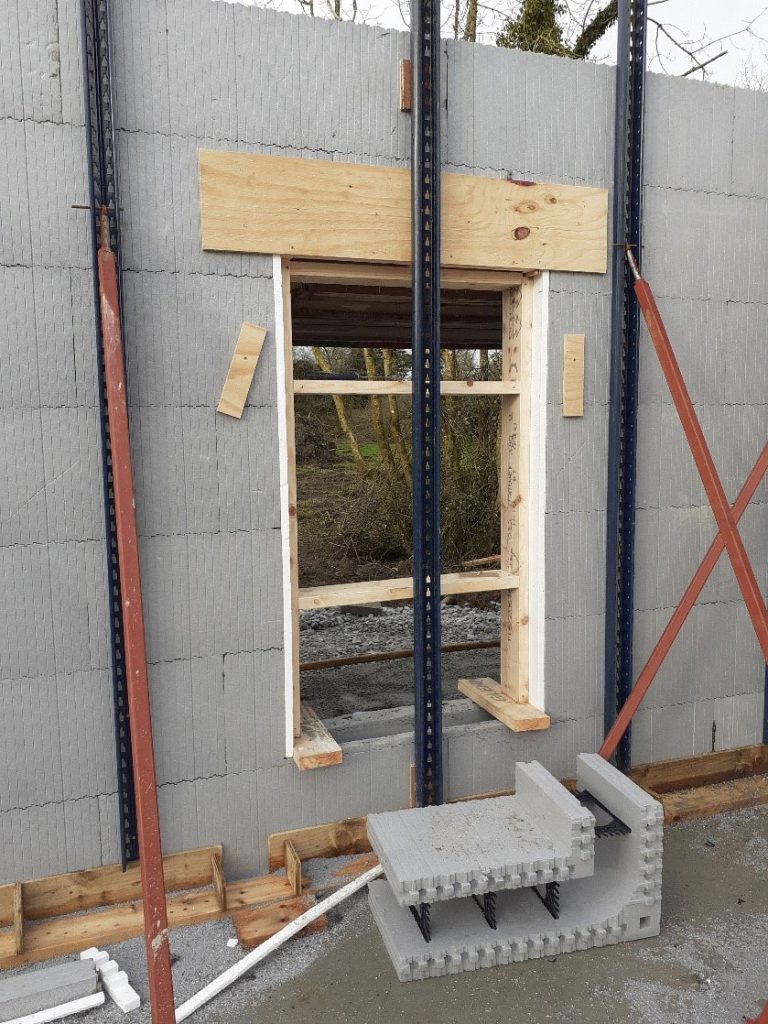
Cavity closers
Most ICF installers use preformed cavity closers, which may be flat and rebated or have raised reveals. These allow the window or door frame to sit tight against the head and reveal. From a thermal perspective and airtightness perspective, this is an excellent detail.
One consideration is frame depth: over 25 per cent of the frame may be hidden behind the reveal unless an extra-deep frame is used.
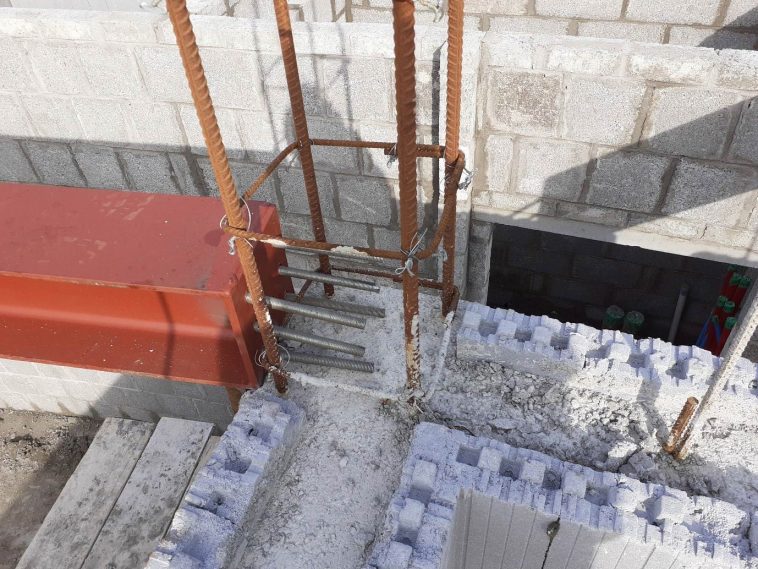
See Figure 1 for the pre formed closers both over the head of the window and on the reveal of the window, ready for the concrete pour. Figure 2 shows a rebated vertical closer waiting to receive a door frame
Cavity closers are propped from the outside with a timber shutter before the pour. If windows of the same size are used on multiple floors, the props can be reused — provided they are removed with care.
Window sills
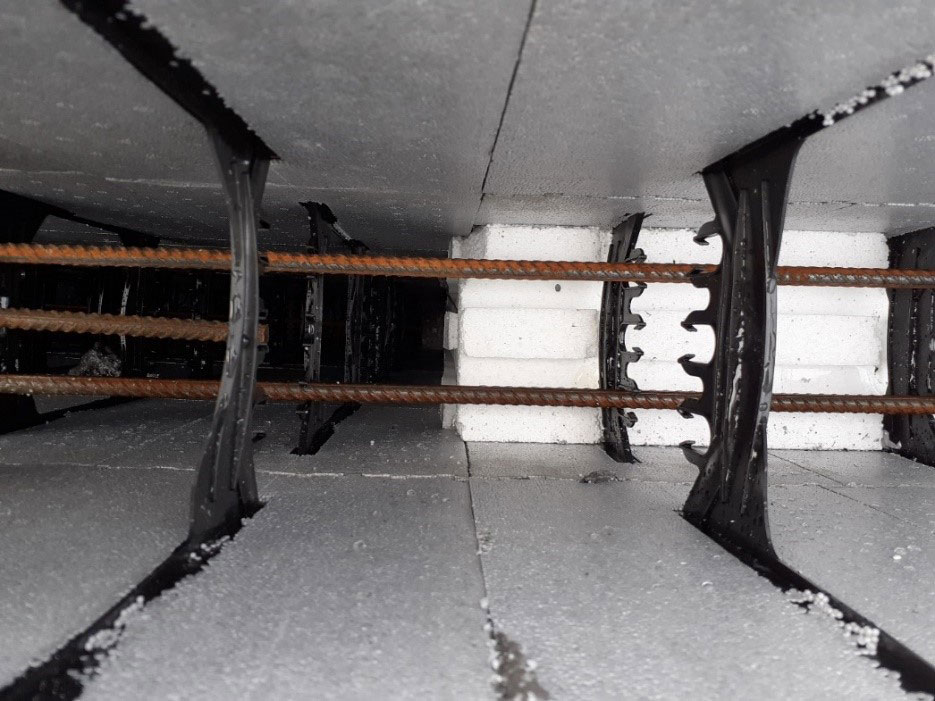
Another issue to be aware of is the placement height of window sills. You need to allow for the height of the sills in the window opening when installing the ICF formwork. Figure 3 demonstrates where the exterior EPS leaf has been trimmed down to accommodate the sill, while the internal leaf is retained for insulation behind the sill.
Another detail often missed is the allowance for sill overhangs or ‘ears.’
The ICF should be cut to accommodate the sill — not the other way around. This is much like the installation of the sill in a traditional blockwork building, leaving you with the required sill overhang on either side of your window opening.
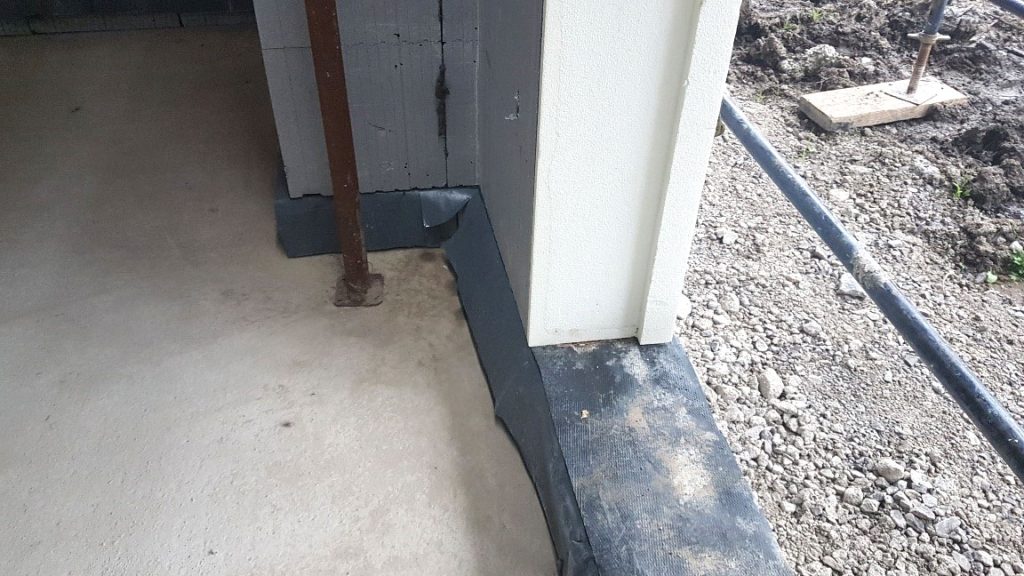
The installation of the DPC around the window sill is still extremely important and should be installed with care and not trimmed until the finished render has been applied.
Chimneys
Although most new homes now use heat pumps and underfloor heating, many self-builders and homeowners like to incorporate a solid fuel stove into their design.
But, chimneys are not covered in the majority of ICF system suppliers’ BBA Certificates. This does not mean that you cannot install a stove with a chimney system. If detailed correctly, chimney systems can comply with Approved Document L. It is strongly advised to consult and engage a certified HETAS installer for both planning and installation of stoves or similar appliances.
It is strongly advised to consult and engage a certified HETAS installer for both planning and installation of stoves or similar appliances.
Internal ICF walls
ICF can also be used for internal walls — both loadbearing and non-loadbearing. The most important connection is between the loadbearing internal walls to the ICF external wall. This should always be detailed by a structural engineer.
If traditional blockwork is used for internal loadbearing walls, thermal blocks are recommended where the block butts up to the ICF concrete core.
Where internal ICF walls are used, only forms rated for internal use should be installed. Some installations include 150mm EPS on one side, a 150mm concrete core and 50mm EPS on the other this not only wastes space but makes it difficult to fix plasterboard into the EPS layer due to the position of the web.
Before pouring, make sure that the walls are all plumb and level, especially around internal door openings. This means there needs to be sufficient propping and bracing of all the internal walls.
The internal finish to the EPS wall is normally a 12.5mm plasterboard slab screw fixed to the PVC/Aluminium webs at 200mm centres in the ICF block.
In wet areas, water-resistant (green) plasterboard should be used. Electrical first fix is made easier by the ease of chasing out channels in the EPS before plasterboard is installed. Walls are then skimmed and finished as required.