Hanging a door isn’t as difficult as most people think. If you take your time, follow some important steps and have someone available to lend a hand at the right time, it’s a sure way to save a few bob and impress the significant other at the same time!
Changing the interior doors in a house can enhance the appearance of any room. Especially successful if you need more light is to replace a solid door with a glass panelled one.
First job is to unscrew the old door from the frame. Remove the hinges from the door if recycling them. Set the old door against the new one for height and trim the new door if necessary. I wouldn’t worry about the difference in width at the moment as this fine tuning can be left until the door is swinging to get a precise fit. It is a good idea to use the hinge recesses in the frame from the previous door. To transfer these hinge positions onto the new door, you can enlist the help of a friend. A good idea is to cut a wedge and slip this under the door. With the tap of a foot against the wedge, the door will rise as the wedge is forced further under the door. (There is also a handy gadget for doing this). Hold the door in position in the frame. The optimum gap between door and frame should be the thickness of a 50c or €1 coin. When you are happy with the position of the door in the frame and the gap looks good, transfer the hinge recess positions onto the door.
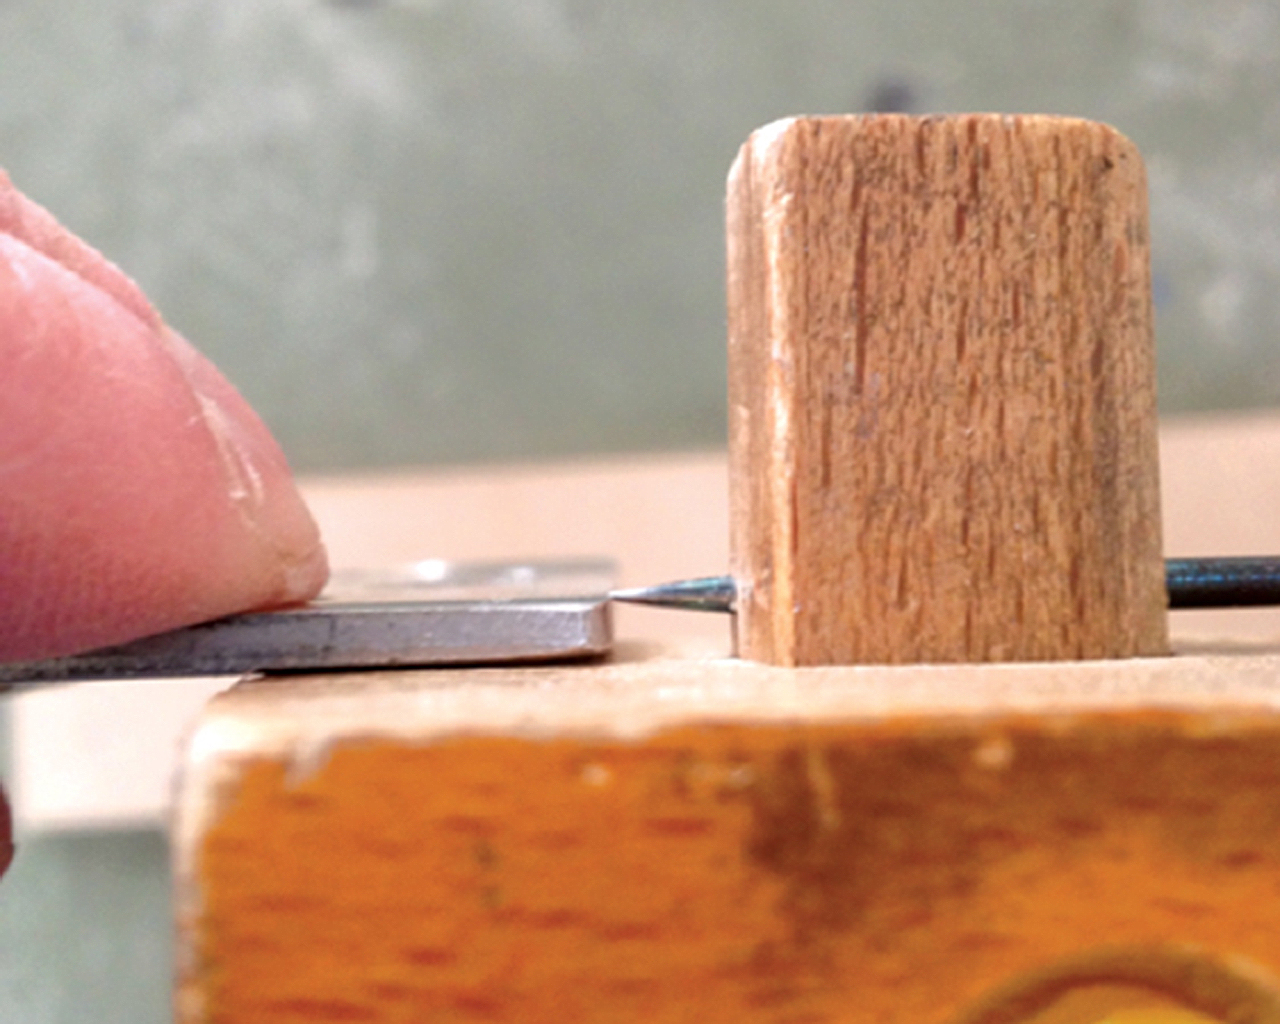
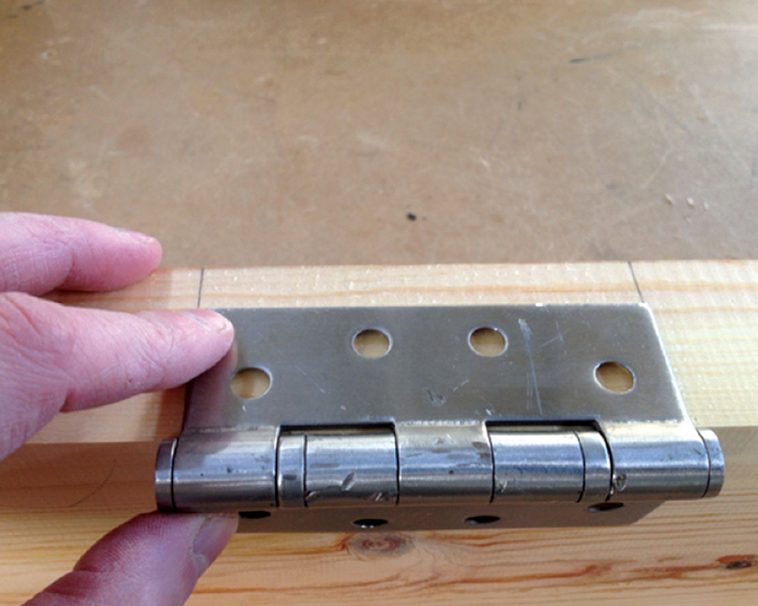
Remove the door and use a square to transfer the lines down the width of the door. Open out the hinge, hold it against the edge of the door and draw around the leaf of the hinge. “The two flaps of the hinge are known as the leaves and the centre pin is called the knuckle.” This gives you the exact position of the hinge location. A good tip is to make sure the pencil you are using is sharp as a blunt pencil will give you a false line to work to. The next job is to mark the depth of the hinge leaf as this is how much you will be removing to accommodate the hinge. You can do this in several ways; the traditional method is to use a marking gauge to get the thickness of the hinge leaf, but measuring with a rule or transferring directly from the hinge can work also.
Once you have the depth, length and width you can begin to remove the waste to house the hinge leaf. There are two ways of removing this waste. One is the traditional method of using a chisel and mallet and the other is with the use of a router and template. In this article I will outline the steps involved when using a chisel and mallet. If you are familiar with using a router you are more advanced than the level of this article.
With a sharp and wide chisel, position the tool a couple of millimetres inside the line and gently tap the chisel around the perimeter of the recess. Don’t aim directly for the line from the outset, you can fine tune the fit when the majority of the waste is removed. Begin at the top of the recess and using gentle taps, work towards yourself, tapping the chisel vertically into the timber. The chisel should be driven into the timber only about 2-3mm. When you have worked from end to end, hold the chisel horizontally and pare the waste away. It should come out easily as it was chopped from above. Continue this process until you are down to the required depth. Now you can work to the pencil line to get a neat fit between hinge and timber. Fix the hinge to the recess using the required number of screws. Repeat the process for the other two or maybe three hinges, depending on the weight of door.
[adrotate banner="58"]Offer the door up to the frame and fix the hinges to the previous recesses. Close the door over and check the gap right around. You may need to set a hinge in a bit further or pack it out. Chances are the door will still get stuck at some point. Mark these positions with a pencil, remove the door from the frame and using either a hand or electric plane, remove these high spots. Unfortunately you might need to do this a couple of times to get a good fit but the end result will be worth it!
That’s the first part is done and dusted, your masterpiece should be swinging like a saloon door. The next step is to fit a lock and a couple of handles. The lock can be tricky but again it just takes patience and a bit of careful planning. The lock is probably a mortise lock. A mortise is basically a square hole into which the lock mechanism fits. To remove this mortise, it is best to drill out the majority of the waste and clean up the sides with the chisel. The face plate has to be recessed into the edge of the door in much the same way as the hinges.
To find the position of the mortise, it can be taken from the receiver that is housed into the frame. The lock must be central to the edge of the door so a centre line is then found. Transfer the lock dimensions onto the edge of the door and using a square and marking gauge, mark out the mortise position.
A corded drill is the best tool for the job when drilling out the waste for the lock. Cordless drills do drain battery power quite fast so have it well charged before you start. The best drill bit for the job is a 25mm spade bit. Wrap some masking tape around the drill bit to act as a depth stop. Drilling on the centre line of the edge of the door, drill as many holes as possible. After drilling out the waste, use your wide chisel to pare the sides of the mortise and square them up. This job is a lot easier if the chisel is sharp and a mallet helps to give you some extra oomph!

When the mortise is finished, test fit the lock; it doesn’t have to be a snug fit. It’s no harm if it rattles around in the mortise, the screws and handles will hold it in place. Push the lock into the mortise and trace the outline of the face plate onto the edge of the door. Use the same method for removing this recess as the hinges. Chop down vertically and then pare away the waste. It is useful to turn the chisel around for this process and use it much like a hand plane. Sharpen your chisel regularly on an oil stone. This makes a huge difference in working it.
The next step is to fit your handles and keyhole. The mortise lock has a square hole through the mechanism. Through this passes a square bar or spindles. The handles also have a square recess to accommodate the square bar as you turn the handle. The next job is to drill a hole through the door to accept the bar. Use a rule to measure the distance of the hole from the front of the face plate and transfer this distance to both sides of the door. Use a drill and bit to drill the hole big enough to take the bar.
For the key hole, again measure the distances from the lock and transfer to the door. The key hole will be directly under the handle hole. There are two ways to cut out the key hole. The first way is to drill a big enough hole and let the escutcheon cover it or, you can drill a big hole and a smaller one below it and cut between them to form the keyhole shape. This is the recommended way and a very apt saw called a “keyhole saw” is used to remove the waste between the two.
Final job is now to assemble it all. Insert the lock and screw it into the edge of the door. Thread the bar through the square hole and fit on the handles. Screw the handles into the door and test them. Try the key in the lock and test. You might need to tweak a couple of things such as loosening screws or removing more from mortise. This is easily fixed and thankfully the hard work is done!
So there you have it. I guarantee you will never take doors for granted again when you hang one for yourself. Enjoy the experience, work safe and best of luck!


